Thursday, June 27, 2013

Making a string ligature for clarinet

I've heard about making string ligatures so I tried making some on my own. The most helpful place to find information was http://forum.saxontheweb.net/showthread.php?75281-Make-Your-Own-Ligature

They say to use nylon thread (which I fully support) but I couldn't find any, so I ended up with a very stiff cotton type thread (commonly known here in Iceland as haggis/slaughter yarn).

What you need for this is:
1. String
2. Tape
3. The mouthpiece that the ligature will go on
4. A reed (preferably an old one if you have one)
5. Wax paper (sometimes used for baking)
6. Epoxy type glue
7. Something to mix the glue and paint with

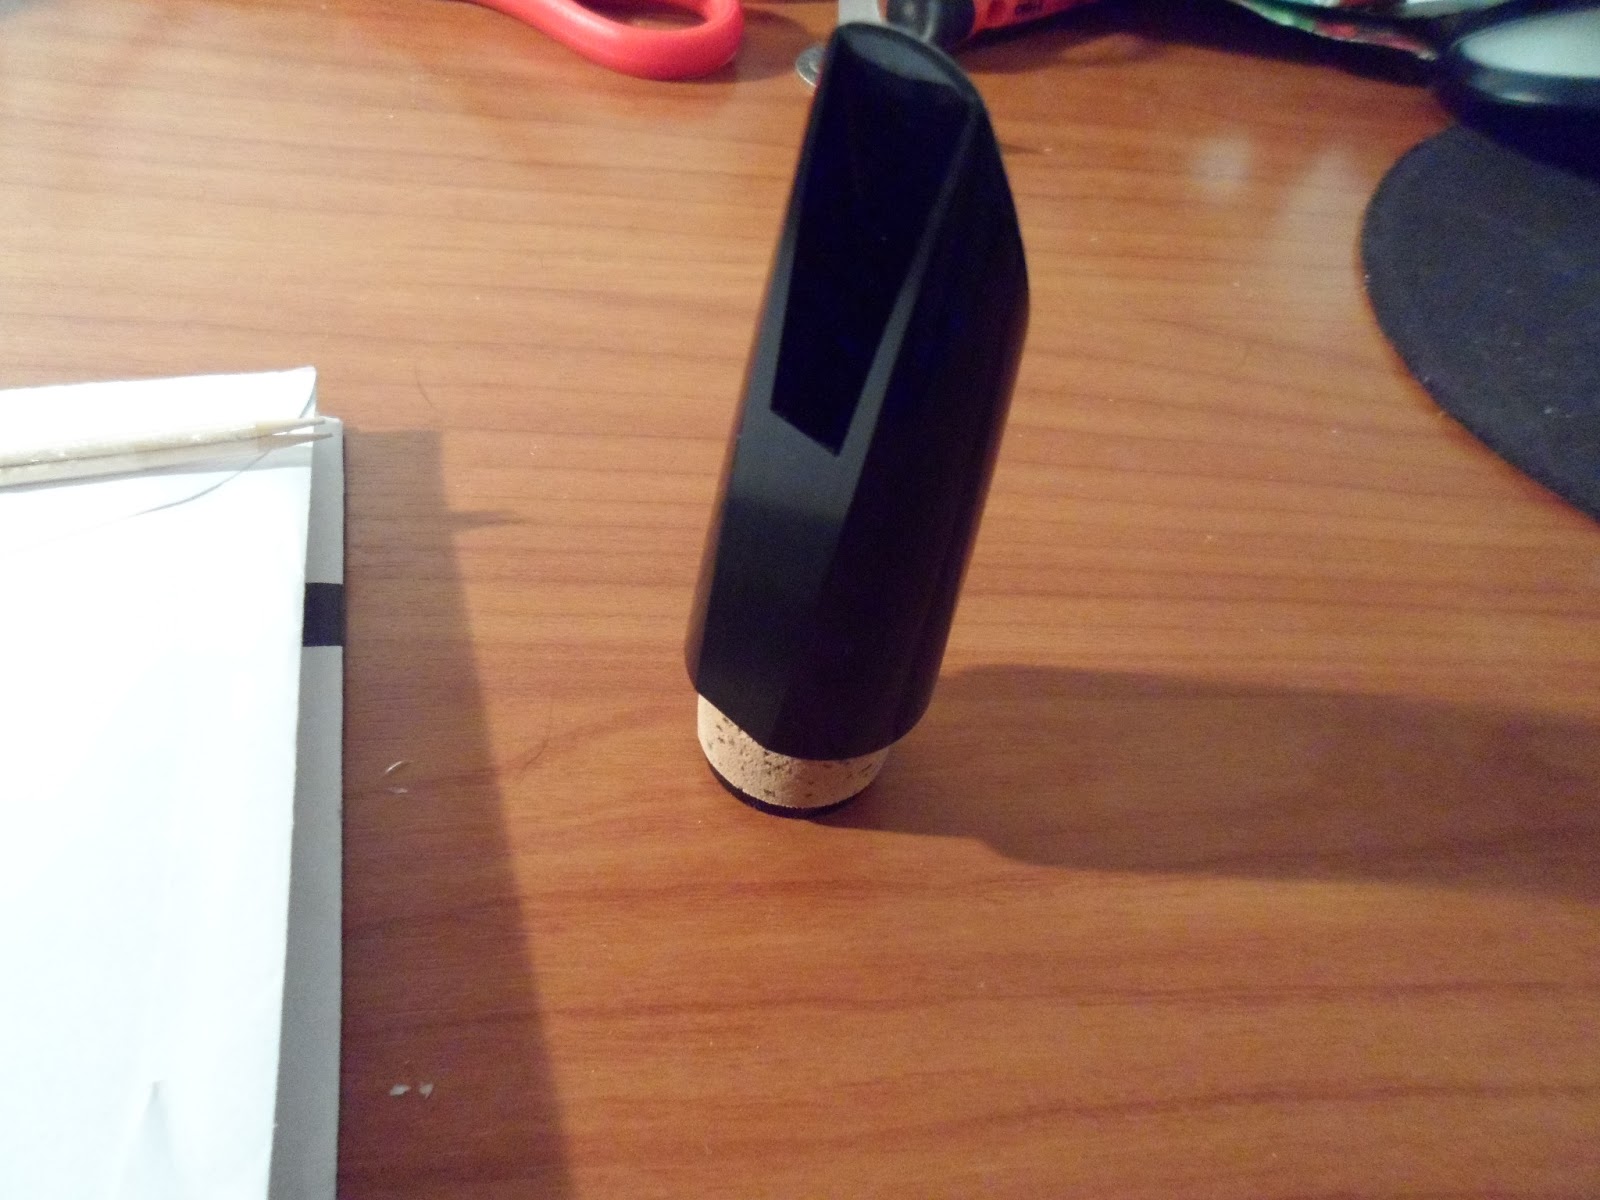
This is the mouthpiece I need a ligature for. Bought it few days ago and forgot to buy a ligature, and since the music store is 500km/300miles away, I thought I should just try to make my own.

 This mouthpiece doesn't have any convenient lines on it like my other one, so I compared and found out that the ligature should start at the line where the reed is cut, and the bottom shall be about half a centimeter (1/6th ish of an inch) from the bottom of the reed.

See that line in the reed? That's what I'm talking about. That's where the top of the ligature should be (maybe slightly below that).

Now, let's save our sanity and just tape the reed on, so it won't be slipping around.

Same goes for the wax paper.

 I suggest putting the tape on top of the reed to hold the wax paper in place, where we won't put glue, I don't want to risk having the epoxy glue stick to the tape!

 This is the thread I used. It's cotton so I was afraid it could stretch, but it's very stiff so I'm giving it a chance.

Let's start. I put the end up on top of the reed, will cut it away later, but I need to tuck it in so it will be less noticeable when  I'm done weaving and gluing.

Starting to weave on top of the end, I think the extra space it provides when I'm done is all right.

 Because it's hard to see where to stop, I put a tiny line with a sharpie.

Now, it's all looking nice. Remember to keep it fairly tight and leave no spaces between rounds. I think I went a bit too far, so stopping one round before the line would have been better.

Tying up the end, being careful to hold the thread so it won't become loose.

 All tightened up! It's ready for the glue now.

This is the glue I used, you can get epoxy glue at most hardware stores (maybe some hobby stores). I taped together three toothpicks and used that to mix and paint the glue on with.

The epoxy before mixing. It smells pretty bad.

Putting the epoxy on. I found it was easier to put a big glob on there and just smear it around. I'm afraid I used a bit too much of it though, so I'll be more careful next time.

There! Notice that I did not put glue on top of the reed. 

 Putting some glue around the end, so I can just cut it off when it's dry.

Shiny!

Let it sit for about 15 minutes (just to be sure, and I wasn't really in a hurry either), and then I just slipped the wax paper with the ligature off my mouthpiece.

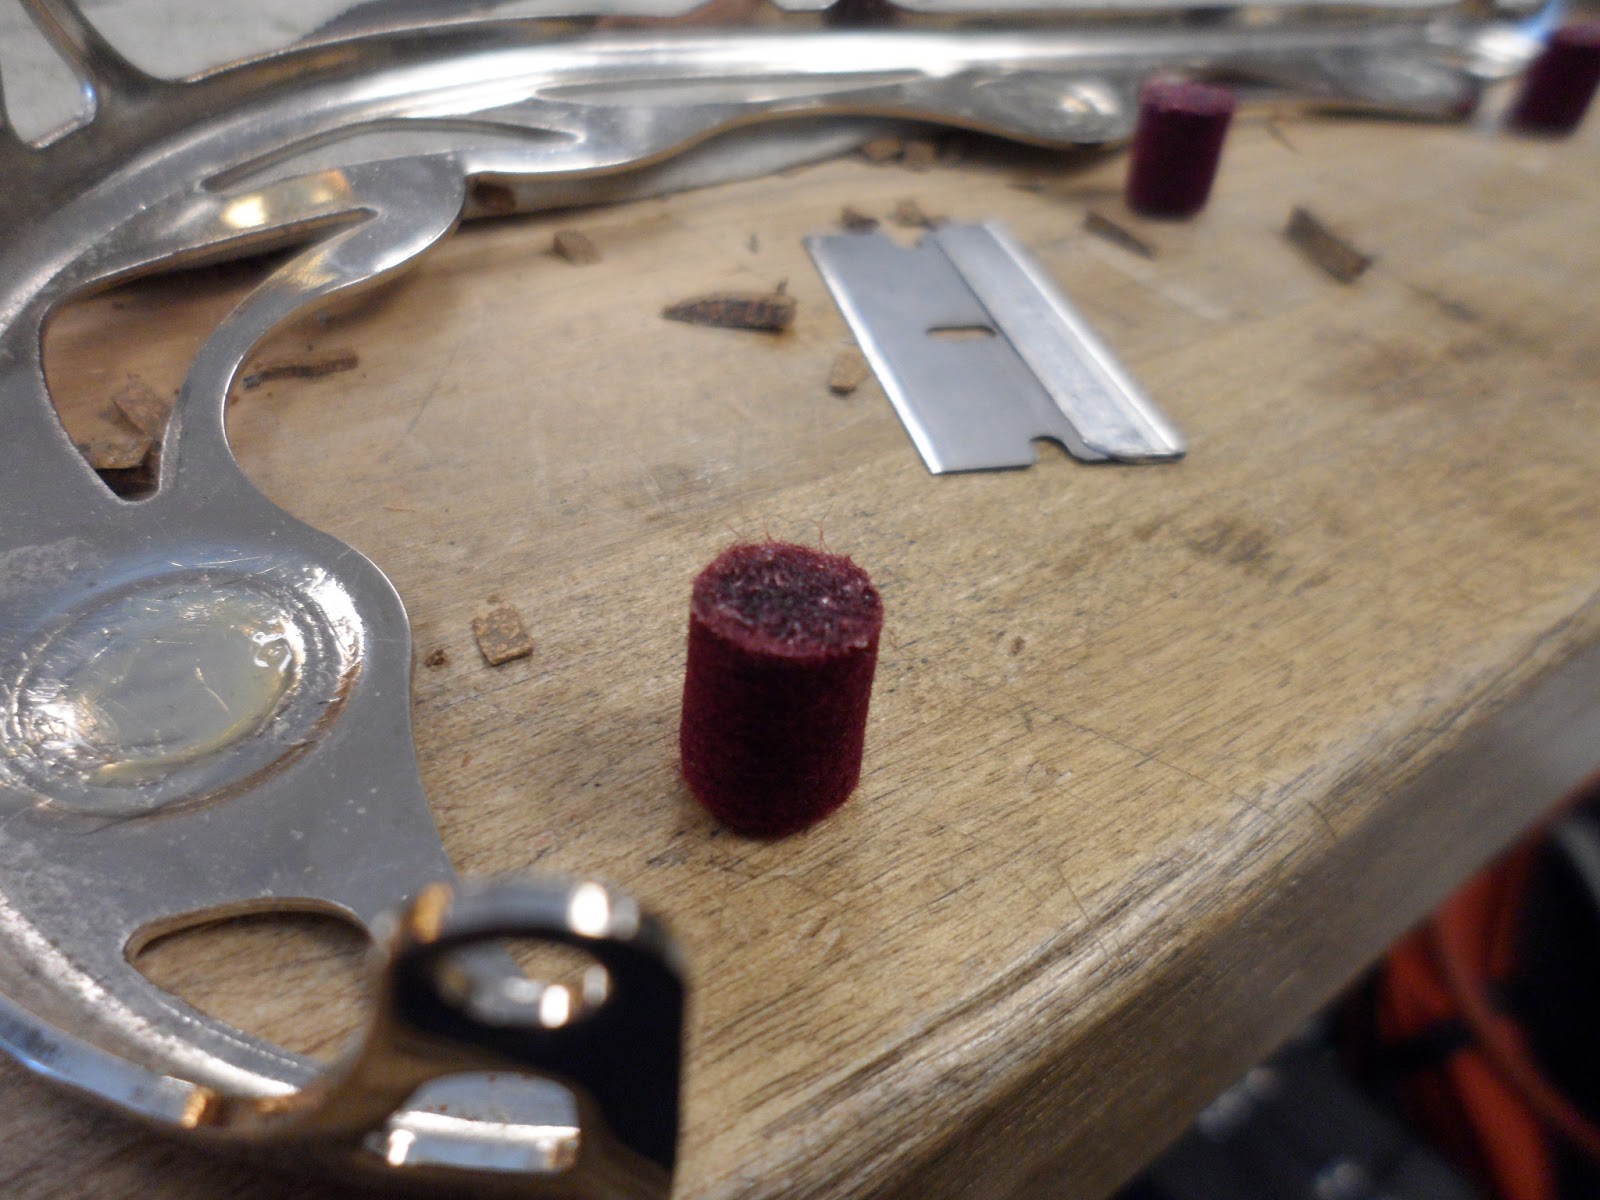
Now, there's tons of excess glue on this thing, so I must take care of that. It's pretty stiff, but still a bit flexible.

This is after I cut the end that went into the ligature, you can't really see it in this picture.

When taking off the excess glue, and it's hard to tell where there is glue left, just slip the ligature on the mouthpiece and it will be easier to spot.

 This is how I positioned the razor blade to shave off the excess, of course I didn't hold it like this though, that wouldn't work at all!

All done! It looks alright too.

 Another shot of the ligature done.

There, I think that's it!

Tuesday, June 11, 2013

week 18 and graduation!

Putting on a felt to the keyguard, it will then stop the bell keys from opening up too much (setting the venting).

There it is on the keyguard, and on the saxophone! And yes, that felt is black, we were out of purple and  I hope Lucas doesn't notice when he grades my saxophone. Black kind of fits because I used black (charcoal) felt on the lower stack in combination with cork.

My saxophone all nice and ready in the case!

Just a nice shot of the upper stack.

Right hand palm keys.

That is a bassoon! (also known as faggott in some places) It's a very interesting instrument, most commonly made of maple, leather (some cork) pads and uses double reeds. We went over the regulation and where points of lost motion are. Overhauling this would have been loads of fun!

Just look at all the keys!

Some funny looking keys.

That's the mellophone again. Notice that it's not a spacegun anymore. Finally!

Had a hard time making some of the flanges behave, so it got really messy. I'll have to buff that off.

The mouthpiece receiver and mouthpipe, now without twisters and in correct position!

 This is where I attached the space gun to the bell, it was a pretty hard solder joint to fit.

Contact solder points. Who's terrible idea was this? Those were a terrible pain to solder and making the solder stick in the right places wasn't fun either. I got it to look fairly good (this is of course before cleanup and buffing).

Oh! Crack repair! I wasn't feeling like drilling a hole myself, so I covered up an old one instead, just to see if I could.

You make a damn out of masking tape, then put superglue on it, then grenadilla (or whatever the clarinet is made out of, if different) dust and hold your finger tight to it (make sure you superglue some dust on your finger too, because it's so much fun to get off). Sadly I failed to take a "after" picture, but just imagine that you can't notice that any work was done to it.

Time to graduate!

And graduated! I graduated with honors (meaning that my grade point average was higher than 3,5 out of 4) and so that's why I have those silly yellow robes hanging around my neck.
I'll keep posting interesting things on my blog, I can't just stop after this!

week 17

Time to cut up our baby clarinets! In this scenario we are pretending that the tenon doesn't fit the socket anymore and we need to cut it off and make a sleeve to make it the right size again. It's pretty invasive but when you're done it's hard to tell it was done and it holds up well too.

Yes, there's cork on one side of it (we're pretending it still has cork on the other side), and it's going to protect that tenon from getting deep chuck marks in.

Now, I've cut down  one side on the lathe to make space for the sleeve.

My tenon when I was done, and the two sleeves (you only need one but somehow I messed up a measurement, so I made another).

This is the one that was too short, oops. It was pretty quick to make so it wasn't too troublesome to make another.

There is the other one. It's supposed to stick out a bit. At this point we would glue the sleeve on to the tenon with some epoxy and let it sit for a while. The glue will stick out a bit on the end which is fine, because then we chuck the (baby) clarinet back into the lathe and cut off the end of the sleeve that is sticking out.

This is my saxophone neck, I discovered some dents in it  where the upper octave key smashes against it (and one has to wonder why they don't put something to protect the key from doing that, when it's off the saxophone, hm..).

Another angle of the dent (I had a similar dent on both sides).

 It looks like the dent is gone now, after I rubbed it a bit with some saxophone tools Lucas showed me.

Looks better now!

Putting on a new neck cork, and when everything was done except for cutting off the excess and waxing it up, I waxed it and melted the wax with my torch. I also got the cork caught on fire. Just my luck!
Note to self: Go slower and keep the torch further away next time!

This is my house in Red Wing. I lived in the attic (top floor). It looks pretty nice on the outside but isn't that great on the inside.